Table of Contents
- Understanding Pet Urine Saturation in Carpet
- Identifying Pet Urine Contamination in Your Carpet
- Making a DIY Carpet Cleaner for Pet Urine
- Using Vinegar and Baking Soda for Pet Urine
- When to Use an Enzymatic Cleaner for Pet Urine
- How Long Does Pet Urine Smell Last in Carpet
- Inspection Checklist for Subfloor Contamination
- When DIY Treatment Falls Short: Know Your Limits
- Preventing Future Pet Urine Odor Problems
- Frequently Asked Questions
Last Updated: October 6, 2026
Understanding Pet Urine Saturation in Carpet
Pet urine odor neutralizer for carpets starts with understanding how the problem develops. When your pet has an accident, urine doesn’t just sit on the surface. It soaks through carpet fibers, into the padding underneath, and can reach the subfloor itself. This is why a quick cleanup often doesn’t solve the smell.
How urine seeps into carpet padding and subfloor
Urine is mostly water. When it hits carpet, gravity pulls it down through multiple layers. The carpet fibers absorb the liquid first. Then it moves into the carpet pad, which acts like a sponge.
Wood subfloors are especially vulnerable. Urine can soak into the wood grain and create permanent damage if not treated quickly. Composite subfloors resist moisture better but still absorb urine compounds over time.
The urine itself breaks down into ammonia and other compounds. These compounds bond to fibers and padding.
Why odor persists and returns with humidity
Here’s where many pet owners get frustrated. You clean the carpet thoroughly, the smell goes away for a few days, then it comes roaring back.
Heat and humidity trigger odor reactivation. When your home gets warm or humid, those dormant urine compounds release odor again. This is especially common in summer or in homes with poor ventilation.
This cycle repeats until you address the source. Surface cleaning alone won’t break this cycle because the urine saturation is still there beneath the carpet.
Pet urine doesn’t stop at the carpet surface, it soaks into padding and subfloor, creating persistent odors that return when moisture or heat activates the remaining compounds.
Identifying Pet Urine Contamination in Your Carpet
Knowing whether your carpet has hidden urine damage is the first step toward choosing the right treatment. Some signs are obvious. Others require a closer inspection.
Visual signs of urine damage beneath the surface
Start by looking at the carpet from above. Fresh urine stains often leave a dark, wet spot. But older stains may be invisible to the naked eye, especially on darker carpet colors.
Flip back the carpet edge in a suspect area. Look at the padding underneath. If the padding is dark, damp, or discolored, urine has soaked through. A strong ammonia smell when you lift the carpet confirms saturation.
Check the subfloor too if possible. If you can access the area beneath the carpet, look for:
- Dark staining or discoloration on wood
- Soft or warped wood subfloor
- A musty or ammonia smell coming from below
- Mold growth or mildew spots
These signs mean the urine contamination runs deep. Surface cleaning alone won’t fix it.
Distinguishing urine odor from other household smells
Not every carpet smell is pet urine. Before you treat the carpet, confirm what you’re actually dealing with.
Urine odor has a sharp, pungent ammonia smell. It’s unmistakable once you know it. The smell is strongest when the carpet is warm or humid. It fades temporarily when the area cools or dries.
Other common carpet odors include:
- Mildew or mold: musty, earthy smell, often in damp areas
- Smoke: stale, lingering smell that doesn’t change with humidity
- Food spills: sweet or sour smell, usually localized to one spot
- Pet accidents other than urine: feces have a different odor profile
If you’re unsure, use your nose strategically. Warm the suspect area with a hair dryer. If it’s urine, the smell will intensify. Mildew and smoke smells don’t respond the same way.
Press a white cloth onto the carpet and let it sit for 10 minutes. Lift it and smell. A strong ammonia scent confirms urine saturation.
Making a DIY Carpet Cleaner for Pet Urine
A DIY pet urine odor neutralizer works because it targets the compounds causing the smell. You can make an effective cleaner from common household items.
Ingredients and tools you’ll need
The basic DIY carpet cleaner for pet urine requires just a few items:
- White vinegar (1 cup)
- Baking soda (1/2 cup)
- Water (2 cups)
- Spray bottle
- Stiff brush or old toothbrush
- Clean white cloths or paper towels
- Vacuum
- Optional: a few drops of essential oil for scent (lavender or lemon work well)
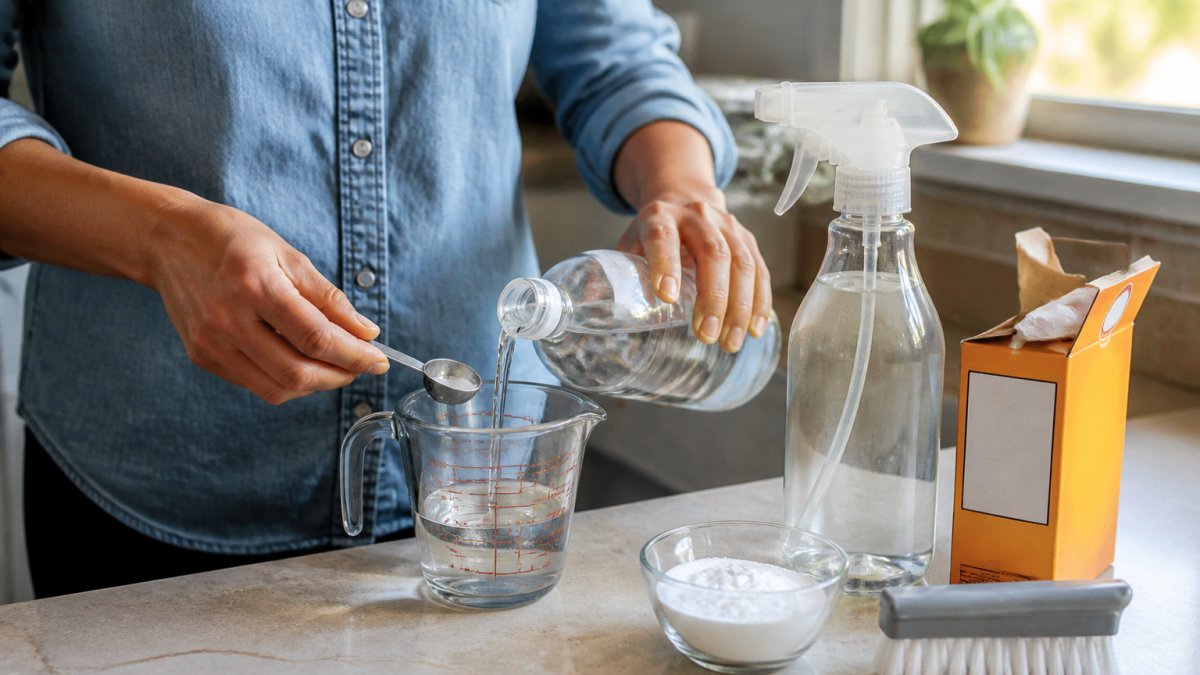
Gather everything before you start. Having tools ready makes the process faster and more effective.
Step-by-step mixing and application process
Step 1: Mix the base solution
Pour 1 cup of white vinegar into your spray bottle. Add 2 cups of water.
Step 2: Apply to the affected area
Spray the solution generously over the stained or smelly carpet area.
Step 3: Scrub the carpet
Use your stiff brush to work the solution into the carpet fibers.
Step 4: Blot with clean cloths
Use white cloths to blot up the wet solution. Press down firmly.
Step 5: Apply baking soda
Sprinkle baking soda generously over the treated area. Let it sit for at least 24 hours.
Step 6: Vacuum thoroughly
After 24 hours, vacuum up all the baking soda. Make multiple passes to ensure complete removal.
Using Vinegar and Baking Soda for Pet Urine
Vinegar and baking soda work together to neutralize urine odor. Understanding why they work helps you use them more effectively.
Why these ingredients work on urine odor
Vinegar is acidic. Urine is also acidic, but vinegar’s acidity breaks down the urine compounds that cause odor. The vinegar smell itself is temporary, it fades as it dries.
Baking soda is a base. It neutralizes remaining acidic compounds and absorbs moisture and odors from the air. Together, vinegar and baking soda create a chemical reaction that eliminates odor at the source rather than just masking it.
This combination is safe for most carpet types and doesn’t leave toxic residue behind.
Application method for maximum effectiveness
Timing matters when using vinegar and baking soda. Apply vinegar first while the area is still warm from the accident. Warm urine compounds are more reactive and break down faster.
Don’t mix vinegar and baking soda together before applying. Apply vinegar first, let it work for 10 minutes, then apply baking soda afterward. The two-step approach gives each ingredient time to do its job.
For stubborn odors that have soaked deep into padding:
- Repeat the vinegar treatment twice with 24 hours between applications
- Leave baking soda down for 48 hours instead of 24 on the second treatment
- Increase ventilation while the baking soda sits, open windows and run fans
Do NOT use vinegar and baking soda on wool or delicate carpet fibers without testing first. Apply the solution to a hidden area and wait 24 hours to check for color changes or damage.
When to Use an Enzymatic Cleaner for Pet Urine
Enzymatic cleaners work differently than vinegar and baking soda. They’re especially useful when DIY methods aren’t cutting it.
How enzymatic cleaners break down urine compounds
Enzymatic cleaners contain live bacteria or enzymes that eat urine compounds. These organisms literally break down the urine molecules into harmless byproducts. This is why enzymatic cleaners often work better on old, set-in stains than vinegar alone.
The enzymes need time to work. They’re most effective when the carpet stays damp for 24-48 hours after application. This gives the organisms time to multiply and break down more urine compounds.
Best practices for enzyme-based treatments
Read the product instructions carefully. Different enzymatic cleaners have different application rates and dwell times.
Apply the enzyme solution to the affected area generously. Cover not just the visible stain but also surrounding carpet where urine may have spread.
Keep the area damp during this time. Don’t vacuum or blot while the enzymes are working.
After the dwell time, blot up excess moisture and allow the carpet to dry completely. Then vacuum thoroughly.
Enzymatic cleaners work best on fresh to moderately aged urine damage.
How Long Does Pet Urine Smell Last in Carpet
The duration of pet urine odor depends on several factors. Understanding these factors helps you know whether DIY treatment will work or if professional help is needed.
Factors affecting odor duration and reactivation
Fresh urine odor can fade within days if treated immediately and thoroughly. But untreated urine can smell for months or years.
The amount of urine matters. A single accident is easier to eliminate than repeated accidents in the same spot.
Carpet type affects how long odor persists. Light-colored, low-pile carpet shows stains more clearly and is easier to treat.
Padding material makes a difference too. Cheap, thin padding absorbs urine quickly and is harder to clean. Quality padding with moisture barriers resists saturation better.
Why moisture and heat trigger recurring odors
Urine compounds don’t disappear completely just because the carpet smells better. They bond to fibers and padding.
Heat accelerates this reactivation. Warm carpet releases more odor than cool carpet. This is why pet urine smell often seems worse in summer or after a sunny day.
Poor ventilation traps moisture in the carpet. Homes with low air circulation struggle more with recurring urine odor. Opening windows and running fans helps prevent reactivation.
Inspection Checklist for Subfloor Contamination
Most guides tell you to “check for damage” without explaining how to actually confirm that urine reached the subfloor. This sequence walks you through a real diagnostic, including the tools that help, the tools that mislead, and what each subfloor material looks like when it’s contaminated.
Tools that help (and what they can’t tell you)
No single tool proves urine has soaked into a subfloor. Each one gives you a piece of the picture:
- UV or blacklight: Urine deposits fluoresce under UV light, which makes old, invisible stains visible. The limits matter: many household substances fluoresce too, detergent residue, some carpet dyes, certain cleaning products, and even dried pet saliva. A glowing spot is a lead, not a verdict. UV light also tells you nothing about depth, so a bright spot on the carpet surface may or may not mean the pad and subfloor are affected.
- Moisture meter (pin or pinless): Useful for finding elevated moisture in wood subfloors, which is a strong signal that liquid reached the substrate. The catch is that a moisture meter reads any water source, a slow plumbing leak, a humid basement, a recent spill, so it can’t distinguish urine from other moisture. Use it to map the affected area, not to confirm the source.
- The nose test: Ammonia smell is the most reliable single indicator, but it’s also the easiest to fool yourself with. Odor strength varies with temperature and humidity, so a cold, dry room can mask a heavily contaminated subfloor. Warm the area first (a hair dryer on low works) before you judge.
- The white-cloth press test: Press a clean white cloth or paper towel firmly into the suspect area for about 10 minutes. A yellow or brown tint plus an ammonia smell is a strong indicator of urine saturation in the pad or below.
A common pattern among technicians is to use all four together: UV to find the footprint, moisture meter to gauge depth, nose test after warming, and cloth test to confirm. Any one alone can send you down the wrong path.
Step-by-step method to confirm urine damage beneath flooring
Step 1: Map the suspect zone. Identify where the accident happened or where the smell is strongest.
Step 4: Inspect the pad first. The pad is the sponge layer.
Step 5: Expose the subfloor. Carefully peel the pad back from the subfloor.
Step 6: Inspect the subfloor material (see the material-specific signs below).
Step 7: Document everything. Photograph the pad and subfloor with a ruler or coin for scale.
Material-specific signs for wood, composite, concrete, and finished floors
Absorption and visible damage differ sharply by substrate. Use the right checklist for what’s under your carpet:
Solid wood subfloor (planks or tongue-and-groove):
- Dark staining that follows the grain and won’t wipe away
- Cupping or crowning, edges of boards rising or centers dipping
- Soft, spongy spots when you press with a screwdriver handle
- Gaps opening between boards as the wood swells and dries
- Persistent ammonia smell even after the surface is cleaned
Solid wood wicks urine deep along the grain. Once saturated, odor is very difficult to remove without sanding down past the contamination or replacing boards.
Composite subfloor (plywood, OSB, particle board):
- Swelling or puffing at edges and seams
- Delamination, layers separating, especially at cut edges
- Soft spots that compress under thumb pressure
- Dark staining that spreads outward from the wet point
- A musty-plus-ammonia smell that returns after drying
OSB and particle board are the most forgiving to replace and the least forgiving to clean, they swell permanently once wet and lose structural strength. Plywood sits in between.
Concrete subfloor (slab-on-grade):
- Dark, irregular staining that may not wipe off
- A chalky or powdery surface where urine salts have crystallized
- Persistent odor that gets worse in humid weather (concrete pulls moisture from the ground)
- No soft spots, concrete doesn’t deform, so odor is your primary signal
Concrete doesn’t absorb urine the way wood does, but it holds residue in its pores and releases odor for years if not sealed. Sealing is usually the right answer here rather than replacement.
Finished wood flooring under carpet (hardwood or engineered):
- Finish clouding, whitening, or peeling at the affected area
- Dark staining that penetrates the finish into the wood
- Cupping at board edges
- Odor that returns with humidity
If the pad is saturated but the subfloor looks and smells clean after warming, you may only need to replace the pad and treat the carpet backing. If the subfloor shows any of the material-specific signs above, plan for cleaning plus sealing at minimum.
Use this inspection method if you’re deciding between DIY treatment, professional cleaning, or subfloor replacement, and keep your photos and notes, because they’re the fastest way to get an accurate assessment from a pro.
When DIY Treatment Falls Short: Know Your Limits
Most guides stop at “call a professional if it’s bad.” That’s not a decision, it’s a shrug. What you actually need is a framework: given what you found during inspection, should you clean, seal, or replace? Here’s how to work through it.
The clean, seal, or replace decision tree
Work through these questions in order. The first one that matches your situation tells you the likely path.
1. Did the pad stay dry and odor-free after warming?
If yes, the contamination is likely surface-level.
2. Is the pad saturated but the subfloor clean?
Replace the pad.
3. Is the subfloor stained or odorous, but structurally sound?
This is the seal case.
4. Is the subfloor soft, swollen, delaminated, or moldy?
This is the replace case.
**5.
**6.
Signs that professional intervention is necessary
Some situations sit outside the DIY path regardless of how handy you are:
- Visible mold or mildew on the subfloor or pad, this is a health issue, not just an odor issue
- Urine has soaked into a finished hardwood floor beneath the carpet
- The subfloor is concrete and the odor returns after sealing (indicates the slab is wicking moisture from below)
- The carpet is wool, sisal, or another delicate fiber that reacts to vinegar or baking soda
- You’ve already replaced pad and cleaned twice with no lasting improvement
- The affected area is under heavy furniture or built-ins that are difficult to move safely
A qualified technician can confirm the contamination depth with a moisture meter and UV inspection, extract what’s reachable, and advise on sealing versus replacement. Ask specifically whether they seal subfloors and what product they use, not every cleaning company does this step, and skipping it is the most common reason odor returns after a professional cleaning.
Health, ventilation, and safety precautions
Old urine contamination is not just a smell problem. Dried urine releases ammonia, and urine-saturated materials can support mold growth. Take these precautions seriously:
- Ventilate first. Open windows and run box fans or a window fan pulling air out of the room before you lift carpet or pad. Ammonia fumes concentrate in enclosed spaces.
- Wear gloves. Nitrile or rubber gloves, not thin food-prep gloves. Urine carries bacteria, and old pad can harbor mold spores.
- Wear an N95 or P100 respirator if you’re pulling up saturated pad or subfloor, especially if you see any discoloration that could be mold. A dust mask is not enough for mold spores.
- Bag and remove contaminated pad promptly. Don’t leave it sitting in the room, it will continue to off-gas. Double-bag it and take it out the same day.
- Keep children and pets out of the work area until the subfloor is dry, sealed, and the new pad and carpet are down.
- If you see widespread mold, more than a small patch, or any mold on structural framing, stop and call a professional. Disturbing mold without containment spreads spores through the house.
- If anyone in the home has asthma or a compromised immune system, treat any confirmed mold finding as a professional-only job.
Never seal over a wet or damp subfloor. Shellac and epoxy primers need a dry substrate to bond and block odor. Sealing over moisture traps it and the odor will return, often worse, because now it’s under a sealed layer.
Use the decision tree in order: dry pad means clean; wet pad with clean subfloor means replace pad; stained but sound subfloor means clean and seal; soft, swollen, or moldy subfloor means replace. Odor that returns after two proper treatments means you skipped a step or the contamination is deeper than DIY can reach.
Preventing Future Pet Urine Odor Problems
Once you’ve dealt with the current problem, prevention is your best strategy.
Use enzymatic cleaners regularly. Even after DIY treatment, apply an enzymatic cleaner monthly to problem areas.
Control humidity. Use a dehumidifier in damp seasons. Keep your home well-ventilated.
Address the root cause. If your pet is having repeated accidents, consult a veterinarian.
Consider protective barriers. Waterproof rug pads or area rugs over vulnerable carpet can protect high-risk zones.
Maintain good air circulation. Run ceiling fans and open windows regularly. Stagnant air traps moisture and odor.
Frequently Asked Questions
Does vinegar neutralize pet urine odor in carpet?
Vinegar is effective at neutralizing pet urine odor because its acidity breaks down the uric acid crystals responsible for the smell. When combined with baking soda, vinegar creates a chemical reaction that lifts odors from carpet fibers. Apply white vinegar directly to affected areas, let it sit for 10-15 minutes, then sprinkle baking soda on top and let it dry completely before vacuuming.
Can baking soda remove pet urine odor from carpet?
Baking soda is a powerful odor absorber that works by neutralizing acidic urine compounds. It’s most effective when used after cleaning with vinegar or an enzymatic cleaner. Sprinkle baking soda generously over the affected area, allow it to sit for 24-48 hours, then vacuum thoroughly. For stubborn odors, repeat the process or combine it with other methods.
How long does urine smell last in carpet if untreated?
Untreated pet urine can produce odor for months or even years, especially if it has soaked through carpet padding into the subfloor. The smell intensifies with humidity and heat, which reactivate urine crystals. Early treatment with a DIY pet urine odor neutralizer prevents the odor from becoming deeply embedded. If the carpet pad is saturated, surface treatments alone won’t eliminate the smell permanently.
When should you use an enzymatic cleaner on pet urine?
Use an enzymatic cleaner for fresh pet urine stains or when DIY methods haven’t fully eliminated odor. Enzymatic cleaners contain live bacteria that consume urine compounds at the molecular level, making them ideal for deep saturation. Apply the cleaner, allow it to sit according to product instructions (typically 24-48 hours), then extract or blot thoroughly. Enzymatic cleaners work best on wet or recent accidents but can help with older stains when combined with inspection of subfloor damage.