
Table of Contents
- How Often to Clean Tile Floors for a Healthy Home
- Best Tools for Tile and Grout Cleaning
- Step-by-Step Grout Scrubbing Techniques
- How to Remove Deep Stains from Grout
- Removing Mold and Mildew Spores from Grout Lines
- The Importance of Sealing Grout for Long-Term Protection
- Benefits of Professional Tile Cleaning for Your Home
- Preventative Measures for Tile Longevity
- Conclusion
- Frequently Asked Questions
Last Updated: September 12, 2026
How Often to Clean Tile Floors for a Healthy Home
Most homeowners guess at this, and the guess is usually wrong. Residential tile and grout cleaning expert tips start with one honest answer: sweep or vacuum high-traffic tile daily, damp-mop once a week, and schedule a deep grout clean every four to six months. At PowerPro Carpet Cleaning, we’ve walked into kitchens where the tile looked fine but the grout had been quietly absorbing grease and soap scum for two years.
Grout is cement-based and porous. It stains from the inside out, which is why surface mopping stops working after a while. Bathrooms need more attention than kitchens because humidity feeds mold and mildew spores in the grout lines. Entryways and mudrooms collect grit that acts like sandpaper on the tile finish.
A simple schedule keeps it manageable:
- Daily: Sweep or vacuum loose debris from high-traffic areas.
- Weekly: Damp-mop with a pH-neutral cleaner and a microfiber cloth.
- Monthly: Spot-treat grout lines and check for efflorescence, that chalky white film.
- Every 4-6 months: Deep clean the grout, or bring in a professional for a full extraction.
The EPA guide to indoor air quality and moisture control explains why damp grout lines matter beyond appearance: excess moisture in a home encourages biological growth that affects the air you breathe.
Skipping the deep clean doesn’t just dull the grout. Sealed grout that stays wet and dirty loses its sealer faster, and once the sealer fails, stains reach the cement. Re-sealing is cheap; regrouting is not.
Best Tools for Tile and Grout Cleaning
The right tools for tile and grout cleaning do most of the work for you. The wrong ones scratch porcelain, chip ceramic edges, and push dirt deeper into the grout lines. What most guides skip is that the tool list changes depending on what your tile is made of. A brush that is safe on porcelain can permanently dull polished marble.
Match the Tool to the Tile Material
Natural stone, marble, travertine, limestone, slate, is porous and acid-sensitive. Ceramic and porcelain are fired and non-porous, so they tolerate more moisture and a wider pH range. Knowing which surface you have prevents the most expensive mistakes.
| Tile Type | Safe Brush | Safe Cleaner pH | Steam Safe? |
|---|---|---|---|
| Porcelain | Soft to medium nylon | Neutral to mildly alkaline | Yes, if sealed |
| Ceramic | Soft nylon | Neutral | Yes, if sealed |
| Marble / Travertine | Soft nylon only | Neutral only | No, heat drives stains deeper |
| Slate / Limestone | Soft nylon | Neutral only | No, moisture can cause spalling |
| Quarry / Saltillo | Soft to medium nylon | Neutral | No, unsealed clay absorbs water |
Essential Manual Tools
A soft-bristled brush is the single most important tool. Stiff wire brushes and abrasive scrubbers gouge grout and dull a polished tile finish. Pair the brush with a microfiber cloth, a squeegee for glass and shower walls, and a grout brush sized to fit the line.
- Soft-bristled brush: lifts grime without damaging grout or polished stone.
- Microfiber cloth: grabs surface grime instead of spreading it.
- Squeegee: clears standing water after showers so grout can dry.
- Spray bottle: applies cleaning solution evenly, which shortens dwell time.
- Grout brush (narrow head): reaches into the line without flooding the tile face.
When to Use a Steam Mop
A steam mop is the best tool for sealed ceramic and porcelain tile when you want to skip chemicals. Steam loosens grime in the grout lines and kills mold and mildew spores on contact. It is a poor fit for unsealed natural stone, where heat and moisture can drive staining deeper and cause efflorescence to bloom.
The Tile Council of North America installation and care guidance notes that cleaning methods should match the tile material, since porcelain, ceramic, and natural stone respond differently to heat and moisture.
Never use a steam mop on unsealed marble, travertine, or limestone. The heat opens the stone’s pores and pushes suspended dirt and minerals deeper, which can cause permanent etching and a chalky white haze.
Tools to Leave on the Shelf
- Wire brushes and steel wool: scratch porcelain glaze and gouge grout.
- Stiff deck brushes: too aggressive for any interior tile.
- Acidic cleaners (vinegar, lemon, CLR-type descalers): etch natural stone and break down grout sealer.
- Bleach on colored grout: fades pigment and can leave a patchy finish.
Before you buy a single tool, identify your tile. A five-dollar soft-bristled brush and a pH-neutral cleaner will outperform a closet full of aggressive products on natural stone every time.
Step-by-Step Grout Scrubbing Techniques
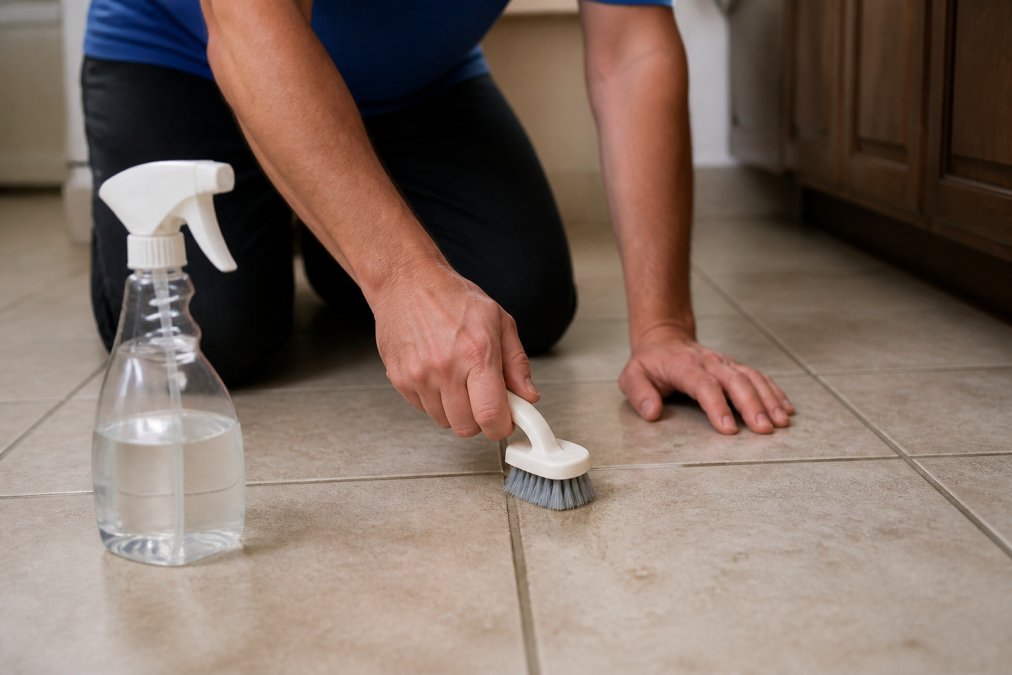
Scrub grout before you mop the tile, not after. Working top-down or dry-to-wet keeps you from dragging loosened grime across clean surfaces.
- Dry-clean first. Vacuum or sweep so you’re not scrubbing grit into the grout.
- Apply your cleaner. Spray along the grout lines and let it sit for the full dwell time on the label, usually a few minutes.
- Scrub in small sections. Work the soft-bristled brush along the lines in short strokes. Don’t flood the floor.
- Rinse the section. Wipe with a clean microfiber cloth or run a rinse cycle with clear water.
- Dry completely. Air movement matters more than heat. A dry grout line resists mold and mildew.
The mistake most people make is scrubbing the whole floor before rinsing any of it. By the time you reach the last tile, the first section has dried with the loosened dirt baked back in. Work in two-foot squares and rinse as you go.
How to Remove Deep Stains from Grout
Deep stains need a different approach than routine cleaning. Grease, wine, coffee, and pet accidents bond to the cement, and a surface wipe won’t touch them. The fix is a targeted paste or solution, a real dwell time, and patience. When cleaning no longer works, the grout may not be dirty, it may be permanently discolored, and that calls for a different strategy.
Homemade Cleaning Solutions and Recipes
Three mixes handle most household stains, and you likely have the ingredients already.
- Baking soda paste: mix baking soda with a little water into a thick paste. Apply to grease and general grime, let it sit 10-15 minutes, then scrub gently.
- Hydrogen peroxide: use on light grout lines for organic stains. Apply, wait a few minutes, then wipe. Test on a hidden spot first, since it can lighten colored grout.
- Dish soap and warm water: the go-to for everyday surface grime. A few drops in a spray bottle is enough.
- Rubbing alcohol: spot-treat ink and some grease marks on sealed tile.
What most guides miss is what NOT to use. Acidic cleaners like vinegar etch natural stone and break down grout sealant over time. Never mix hydrogen peroxide with vinegar in the same bottle.
Stain-by-Stain Playbook
| Stain | Best First Attempt | Dwell Time | Watch Out For |
|---|---|---|---|
| Grease / cooking oil | Baking soda paste | 10-15 min | Re-greasing if not fully rinsed |
| Coffee / tea | Hydrogen peroxide (light grout) | 5-10 min | Lightening colored grout |
| Red wine | Hydrogen peroxide + drop of dish soap | 5-10 min | Spreading before it dwells |
| Pet accidents | Enzyme cleaner, then peroxide | 15 min | Odor returning if not fully extracted |
| Ink / marker | Rubbing alcohol on a cloth | 1-2 min | Drying out sealer with repeated use |
| Rust (from cans, tools) | Oxalic-acid gel (test first) | 5 min | Etching natural stone |
| Efflorescence (white powder) | Dry brush, then diluted white vinegar on ceramic only | 5 min | Never on marble or travertine |
Match the cleaner to the stain and the tile material. A strong acidic cleaner that works on ceramic can permanently etch marble or travertine.
When Cleaning Stops Working: Grout Color Restoration
There is a point where no brush, paste, or professional extraction will bring grout back to its original color. Years of ground-in dirt, failed sealer, and mineral staining can permanently darken cement-based grout. This is where most guides stop, but it is exactly where the real fix begins.
Two options restore color without regrouting:
- Grout pens and markers: a dye-based pen coats the grout line with fresh pigment. Best for small areas, touch-ups, and light-to-medium discoloration. Expect to reapply every 6-12 months in high-traffic areas, and know that the color can wear unevenly on floors versus walls.
- Grout colorant / recoloring sealer: a thicker, epoxy or acrylic-based coating that both seals and recolors. It bonds to the grout, resists staining, and lasts years when applied correctly. This is the better choice for whole-room restoration or grout that has faded unevenly.
Both options require clean, dry, fully cured grout. Applying colorant over dirty or damp grout traps moisture and causes peeling within months. If the grout is crumbling, cracked, or missing in sections, recoloring will not fix it, that is a regrouting job.
Before committing to a colorant, test it on a single grout line in a low-visibility corner. Let it cure for 24 hours, then scrub it with your normal cleaner. If it holds, proceed. If it fades or peels, the grout likely still has sealer residue that needs stripping first.
Efflorescence: The White Haze Most Guides Ignore
Efflorescence is a chalky white or gray powder that appears on grout and tile edges. It is not dirt and it is not mold. It is mineral salt carried to the surface by moisture moving through the cement or the substrate beneath it. Scrubbing it away without addressing the moisture source guarantees it returns.
- On ceramic and porcelain: dry-brush first, then wipe with a diluted white vinegar solution, rinse, and dry completely.
- On natural stone: never use acid. Use a poultice or a commercial efflorescence remover formulated for stone, and address the water source.
- Prevention: fix grout cracks, reseal on schedule, and check for leaks behind the wall or under the floor. Efflorescence that keeps returning is a moisture problem, not a cleaning problem.
If efflorescence appears in the same area repeatedly, a professional moisture assessment is worth the call. Cleaning the symptom without finding the source is a cycle that never ends.
Removing Mold and Mildew Spores from Grout Lines
Mold and mildew in grout lines come from moisture, not dirt. You can scrub the visible black spots away and watch them return within weeks if the underlying dampness never gets fixed.
Start by improving ventilation. Run the exhaust fan during and after showers, and wipe walls with a squeegee so water doesn’t sit in the grout. For the spores themselves, hydrogen peroxide or a diluted oxygen bleach works on most tile. Let it dwell, scrub with a soft brush, then rinse and dry thoroughly.
The CDC guidance on mold cleanup and moisture control recommends fixing the water source first, because cleaning without addressing moisture just resets the clock. If the mold keeps returning in the same grout lines, the problem is water getting behind the tile, not the cleaning routine.
The Importance of Sealing Grout for Long-Term Protection
Sealing is the step almost everyone skips, and it’s the one that saves the most work. A penetrating sealer soaks into the grout and blocks liquids from absorbing, which keeps stains on the surface where you can wipe them away.
Seal new grout after it fully cures, usually a few days, and re-seal every 12 to 18 months depending on traffic. A simple water test tells you when it’s time: drip a little water on the grout. If it beads up, the sealer is holding. If it soaks in and darkens the line, re-seal.
Penetrating sealers are the right choice for grout because they don’t leave a film. Surface sealers can trap moisture and cause grout haze or discoloration.
Benefits of Professional Tile Cleaning for Your Home
Professional tile cleaning does what a mop and brush can’t: it extracts the dirt that’s already bonded into the grout and resets the surface so it holds a sealer properly. For homeowners in Monmouth County and across central New Jersey, it’s often the difference between tile that looks tired and tile that looks new.
The benefits show up fast:
- Deeper clean: high-pressure extraction pulls grime out of the grout lines instead of pushing it around.
- Healthier air: removing mold, mildew, and trapped allergens improves indoor air quality for families and pets.
- Faster drying: low-water methods mean floors are back in use within hours, not a full day.
- Longer tile life: clean, sealed grout resists staining and delays costly regrouting.
At PowerPro Carpet Cleaning, our technicians are trained to Inspection Institution of Cleaning and Restoration standards and use organic, green-certified solutions, so the clean is tough on grime without leaving dirt-attracting residue behind.
Preventative Measures for Tile Longevity
Prevention costs far less than restoration. A few habits keep tile and grout in good shape between deep cleans.
- Use doormats and take shoes off at entryways to cut the grit that scratches tile.
- Wipe spills immediately, especially wine, coffee, and pet accidents, before they bond to the grout.
- Use pH-neutral cleaners for routine mopping. Acidic cleaners and abrasive scrubbers wear down the sealer and the tile finish.
- Fix leaks fast. A slow drip behind a wall or under a sink is the leading cause of recurring mold.
- Re-seal on schedule. The water-bead test is your reminder.
Keep a small caddy with a soft-bristled brush, a pH-neutral cleaner, and microfiber cloths in each bathroom. When the tools are already there, spot-cleaning grout lines takes two minutes instead of becoming a weekend project.
Conclusion
Tile and grout reward consistency. Daily sweeping, weekly pH-neutral mopping, and a deep clean every few months keep grout lines looking sharp and stop small stains from becoming permanent. When the grout has gone too far, or you want the job done right the first time, PowerPro Carpet Cleaning handles residential tile and grout cleaning with organic, green-certified solutions, low-water extraction that dries within hours, and technicians trained to Inspection Institution of Cleaning and Restoration standards. We back every job with a 100% satisfaction guarantee and are available 24/7 for emergencies. Get started with PowerPro Carpet Cleaning and see your tile and grout restored to a healthier, brighter finish. Call us at 848 347 3201.
Frequently Asked Questions
What do professionals use to clean grout and tile?
Professionals often use high-pressure steam cleaners and pH-neutral cleaners to safely remove dirt without damaging the tile finish. They may also use specialized tools like soft-bristled brushes and microfiber cloths. For tough stains, they might use a penetrating sealer after cleaning to protect the grout. This approach ensures a deep clean that lasts longer than typical DIY methods.
What should you not clean grout with?
Avoid using acidic cleaners like vinegar or lemon juice on natural stone tiles, as they can etch the surface. Abrasive scrubbers can scratch tile and grout, making them harder to clean over time. Also, avoid bleach on colored grout as it can cause fading. Stick to pH-neutral cleaners and soft-bristled brushes to preserve your tile and grout.
How often should you have professional tile and grout cleaning?
For most homes, professional cleaning is recommended every 12 to 18 months, depending on foot traffic and whether you have pets. High-traffic areas like kitchens and bathrooms may need cleaning every 6 to 12 months. Regular sealing can extend the time between cleanings. If you notice discoloration or mold, it’s time to schedule a professional service.
Does professional cleaning damage tile sealant?
When done correctly, professional cleaning does not damage tile sealant. Technicians use pH-neutral cleaners and low-pressure steam that are safe for sealed surfaces. In fact, cleaning removes dirt that can degrade the sealant over time. After cleaning, they may recommend reapplying a penetrating sealer to maintain protection. Always hire trained professionals to ensure safe methods.